A Practical Routine Using a Pubic Hair Trimmer for Men
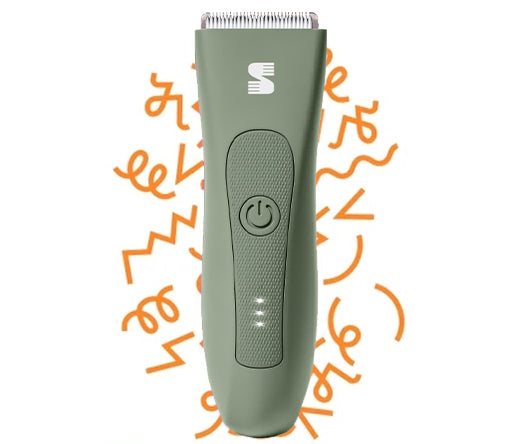
A practical pubic-hair routine should focus on shortening and controlling hair rather than removing every strand as closely as possible. Start with clean skin, choose a conservative guard length, reduce longer hair gradually, and work in small sections without pressing the blade into the skin. Adjust your technique for flatter areas, skin folds, and loose skin instead of using one movement everywhere. Follow the device instructions, avoid damaged or irritated skin, and stop immediately if the trimmer pulls hair, becomes unusually hot, damages the skin, or cannot move smoothly. A controlled result is usually more useful than an unnecessarily close finish.
Preparation
Begin by deciding what result you actually want. If your goal is easier maintenance, less bulk, or a more even appearance, you may not need a very short setting. Leaving some length can make the process easier to control and may reduce the amount of repeated contact with the skin.
Check the area before trimming. Do not run a trimmer over cuts, open sores, active rashes, swelling, unexplained bumps, or visibly irritated skin. Trimming around a minor skin condition without understanding it can worsen irritation, so postpone the routine until the area has recovered or seek appropriate professional advice when needed.
Long hair should be clean and free from heavy oils, powders, or styling products. Whether the area should be dry or damp depends on the trimmer. Some devices are designed for dry use, some permit wet use, and others have specific restrictions, so follow the manufacturer’s instructions rather than assuming water resistance.
Prepare a well-lit space where you can maintain a stable position. Keep the trimmer, guards, cleaning brush, towel, and any manufacturer-approved cleaning supplies within reach. Good visibility and balance matter because rushed repositioning can reduce control.
Tool Setup
Inspect the trimmer before bringing it near the body. Confirm that the blade or cutting head is seated correctly, the guard is attached securely, and no teeth are bent, chipped, or blocked by old hair. A loose guard can change the effective cutting length while you are working.
If the hair is long, begin with a longer guard than you think you need. You can shorten it in another pass, but you cannot restore length after cutting too closely. A staged approach also helps the trimmer process less hair at once, which may reduce snagging.
The main role of a pubic hair trimmer for men is controlled shortening and length management on external body areas. When comparing tools, look beyond claims about closeness and consider how easily you can hold the device, guide it through curves, attach guards, clean the cutting head, and stop the blade when needed.
Turn the trimmer on before it touches the hair and listen for an even operating sound. Unusual vibration, intermittent power, excessive heat, or a damaged attachment are reasons to stop and inspect the device. Do not continue simply because the trimmer still moves.
Step-by-Step Routine
Start on a relatively flat section of the pubic mound. Hold the trimmer so the guard rests lightly against the hair rather than pressing the blade toward the skin. Use short, slow passes and remove collected hair from the guard whenever buildup interferes with movement.
For the first pass, move in the direction the hair naturally grows. This approach may leave slightly more length, but it generally gives you better feedback about how the trimmer handles the hair. Once the bulk has been reduced, inspect the area before deciding whether another pass is necessary.
If you want a more even finish, make a second pass from a different direction using the same guard. Avoid repeatedly moving over one small area without checking the skin. Additional passes can improve consistency, but they also increase contact and friction.
Use your free hand to improve visibility and keep the working surface stable. The goal is not to stretch every area as tightly as possible. Apply only enough tension to prevent folds or loose skin from entering the cutting path.
Pause when changing positions. Turn off or move the trimmer away from the body before adjusting your stance, changing guards, or clearing trapped hair. Trying to reposition while the blade remains against the skin creates unnecessary risk.
Area Adjustments
The pubic mound is usually the easiest place to establish your preferred length because the surface is broader and more stable. Begin there before moving toward narrower areas. It gives you a chance to confirm that the selected guard produces the result you expected.
Near the groin creases, shorten your strokes and reduce pressure. Hair direction may change within a small area, so inspect the growth pattern instead of forcing the trimmer through resistance. Approach folds from an angle that keeps loose skin away from the teeth.
Loose scrotal skin requires a more conservative technique. Only use a device in this area when its instructions specifically permit it. Keep the skin flat with your free hand, use minimal pressure, and avoid moving the blade directly into wrinkles or folds.
Do not use the same fast, sweeping movement across every body area. Flatter sections may allow longer strokes, while curved or mobile areas require smaller passes and frequent repositioning. A guard that works well on the pubic mound may also feel difficult to control in tighter areas, so changing the setting or stopping earlier may be more appropriate.
Never continue into an area that you cannot see or stabilize. If the trimmer cannot maintain smooth contact, the guard repeatedly lifts, or the skin keeps folding into the cutting path, stop and reassess your position or leave that section untrimmed.
Cleanup and Maintenance
After trimming, brush or rinse away loose hair according to the device instructions. Do not immerse a trimmer unless the manufacturer clearly states that the entire unit can be submerged. A washable cutting head does not always mean the handle or charging components are waterproof.
Remove the guard and clear hair from both sides of the attachment. Hair trapped around moving parts can affect later performance and make the next session less predictable. Allow washable parts to dry fully before reassembly or storage.
Clean the skin gently rather than scrubbing it. Pat the area dry with a clean towel and avoid immediately applying strongly fragranced products to freshly trimmed skin. If you already use a mild product without problems, follow its normal directions rather than adding several new products after trimming.
Check the cutting head for wear before storing the device. Replace blades, foils, guards, or other parts according to the manufacturer’s schedule and condition guidelines. A dull or damaged component may pull hair and encourage you to apply more pressure.
Mistakes to Avoid
Starting without a guard is a common mistake when the real goal is only neat length control. A bare blade may cut much closer than expected and leaves less room for uneven pressure or changes in body contours.
Another mistake is forcing the trimmer through dense hair. If the device slows down, pulls, or stops cutting smoothly, lift it away and clear the guard. Divide the area into smaller sections or use a longer setting for the first pass.
Avoid pressing harder when the result looks uneven. Pressure does not necessarily improve cutting performance and may bring the moving blade closer to the skin. Check whether the guard is blocked, the hair is lying flat, or the growth direction has changed.
Do not chase perfect symmetry by making repeated passes over the same spot. Body hair grows in different directions and densities, so complete visual uniformity may require more skin contact than the result is worth.
Stop immediately if you feel sharp pain, repeated pulling, pinching, burning heat, or blade contact with folded skin. Also stop if you notice bleeding, a new cut, rapidly increasing redness, or device damage. Clean the area gently and do not resume the session simply to finish the remaining hair.
Make the Routine Repeatable
A useful grooming routine is one you can repeat without rushing or relying on aggressive blade contact. Start longer, shorten gradually, and judge each area according to how well you can see, stabilize, and control it.
The closest possible trim is not automatically the most practical result. Consistent length, manageable cleanup, secure guard use, and clear stopping boundaries matter more than removing every visible strand. Follow the trimmer’s instructions, maintain its cutting components, and leave difficult areas alone when you cannot work on them with steady control.